We use cookies to make your experience better. To comply with the new e-Privacy directive, we need to ask for your consent to set the cookies. Learn more.
2d or not 2d - That is the question
James Bowden explains the step-by-step process to super-detailing the elderly Airfix/Dapol BR Mk2d aircon stock
Ever since I was a small boy, I would watch the model trains go round at my local model railway club in Berkshire and remember seeing all the various offerings from the manufacturers of the day going round and round the club layout. It was common place to see a rebuilt Wrenn West Country hauling a rake of Lima or Mainline BR Green Mk1 coaching stock and Lima class 50 diesels pulling Airfix blue and grey BR Mk2D air-con coaches that seemed to go on for ever and ever.
30 years later and with no major manufacturers' of modern model railway products seemingly interested in making new tooling for this major gap in the railway modelling missing link on the horizon, (sure there is the excellent new model from Murphy's Models in Irish Railways livery with the appropriate modifications for the operating area) and Hornby seem to be happy to churn out the ageing moulding of the original Airfix/Dapol offering I decided on a small but important project to revamp this iconic British Railways design for my layout and the missing link in my coaching stock. I started by looking at a well know auction site on the web and soon found that for under £10 you can buy a 1st class open coach by Airfix/Dapol and £12 will buy you a brake end coach. 2nd class stock seems to go for a lot more money with the blue and grey offerings from Hornby reaching the dizzy heights of £40 and more per coach.
Airfix cheapy route it is then. Surfing on the net opens a very wide spectrum of offerings from all the 'cottage industries' with most parts required only costing a few pounds a time and research on forums and preservation trusts give all the information required for most projects for the humble railway modeller to digest. With this in mind I had a shopping list.
Airfix/Dapol Mk2d 1st class coach (boxed, mint), Shawplan 'Lazerglaze'
& Shawplan etched BR coach handles & knobs
Bachmann B4 type bogie pack
Parkside Dundas mounting blocks for NEM pockets
Railmatch Executive Light Grey & Satin Varnish
Revell Number 9 Anthracite Grey/Black
Fox Transfers pack numbers F4201, F4208 and F4203.

So now I have all the parts needed to start on the project. Let's begin.
I started by taking the two bogies off the chassis with wheels in place. These just clip into the chassis with a button type fixing followed by the corridor connections which, again, just clip in. This means that the chassis should just drop out with a little gentle persuasion. Next came the glazing which seems to have been bonded in very well with a liquid solvent: time to take a little extra care as I don't want to damage the body of the coach. Finally I carved off the door knobs, grab rails, lamp irons, end handrails and roof mounted grab rails with a sharp Swann scalpel. Now to give the coach a little attention with some fine grade wet and dry over the freshly carved areas followed by washing the whole coach off with a little Fairy Liquid to remove any debris and grease.
With the coach body ready for a few coats of paint, now's the time to fit the new window 'Lazerglaze' panels. These are simply a push fit into the original holes in the coach side and I used a flat edge to ensure they are as close to the outer coach window frame as possible without ticking out. Shawplan also make new etched frames for the Mk2 air-con series of coaches but I opted not to fit these as it involves a little more work with a knife on the side of the coach and with the viewing distance involved for me it isn't justified.

New windows fitted and body rubbed down ready for painting
I glued all the windows in with Carrs Butanone liquid cement which I find works really well with both types of plastic involved. It's tempting to take off the white protective covering from the new glazing but it's wise to leave it in place on both sides as masking for the painting and varnishing process. Next I masked the roof of the coach against overspray and air brushed the dark grey over the side of the coach with the Intercity Light Grey to follow the next day.
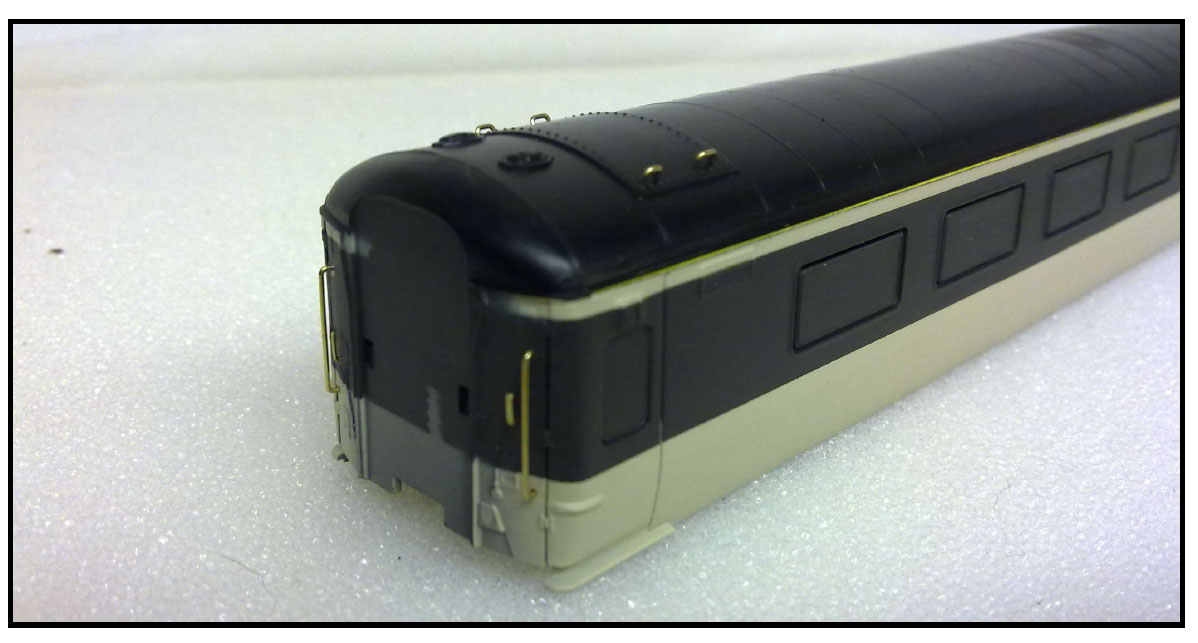
Body painted with new brass handrails & lamp irons fitted
Now is the time to make and fit new end vertical handrails, lamp irons and roof hatch grab rails made out of 0.40mm brass rod held with thin 5 second bond super glue. A final mask with tape to the sides of the coach allows the black to be applied to the roof and coach ends. Whilst his is drying it's time to turn to the chassis and the mounting of the new bogies needs to be the first job. Having decided to run the improved fleet on Bachmann B4 type bogies, the first job is to make a new mounting plate for the bogies by removing the original Airfix/Dapol fixing oulded into the main chassis. I used a cutting disc in my Dremel at the lowest speed setting. Once both ends had been cut out I trimmed with a knife and cut two new plates from 2mm plasticard and glued in place with Butanone, making sure that the plate was level on the inside face of the coach chassis so as not to foul the seating area when it’s refitted.
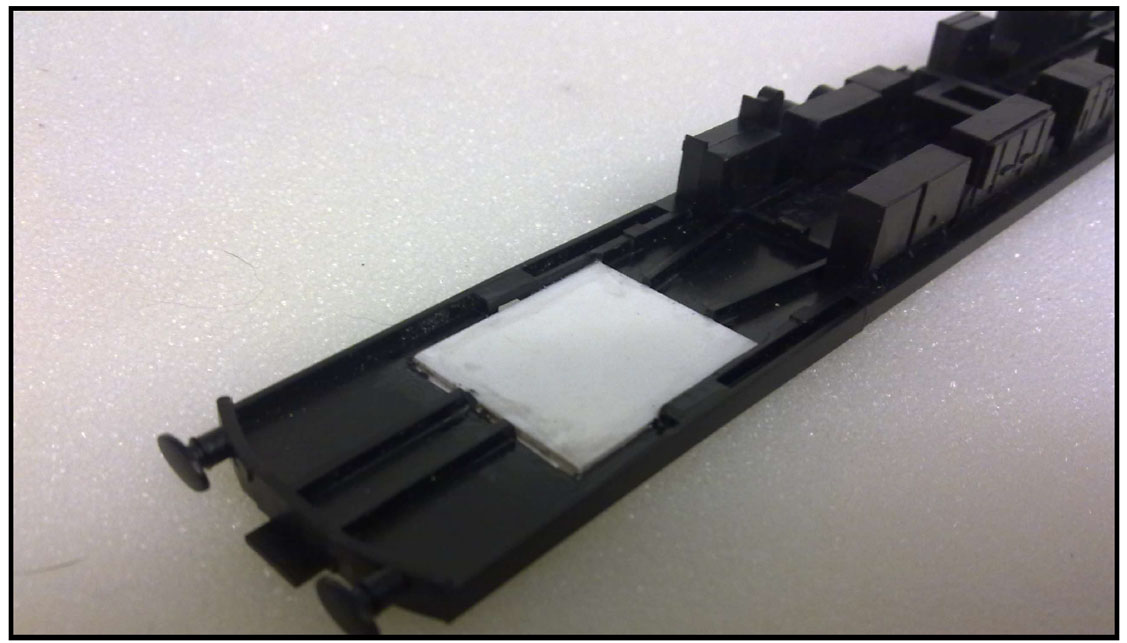
New bogie mounting plates in place
Time now to airbrush the chassis and corridor connections satin black and leave to dry, whilst I turn my attention to the B4 bogies and their mountings for the chassis and the NEM pocket holders. To give the correct ride height I used a scrap of 1mm plasticard cut in a circle and glued to the top facing of the bogie mount. Next I drilled a pilot hole with a 0.5mm drill in the circle and held it to the chassis underside. Once happy with the bogie location I pushed on with the remainder of the drilling into the chassis mounted plate and opened up both holes to accept an 8BA bolt and nut for the final mounting. Now time for the NEM pocket holding bracket to be fixed to the bogie. I used some more scrap 1mm plasticard to make a plate which has been glued into place with butanone followed by the mounting block. This is the time when you have to decide how much of a close coupling you want on the rake of coaches by adjusting the mounting block to suit your needs. Once I was happy I gave the whole assembly a generous wash over with the butanone and left the bogies to dry. To help the bogie turn and to reduce friction I glued a small brass washer to the bogie mounted plate before final fixing with the nut and bolt.
Once dry I air brushed the bogies satin black and picked out the
coil springs in red as per prototype.
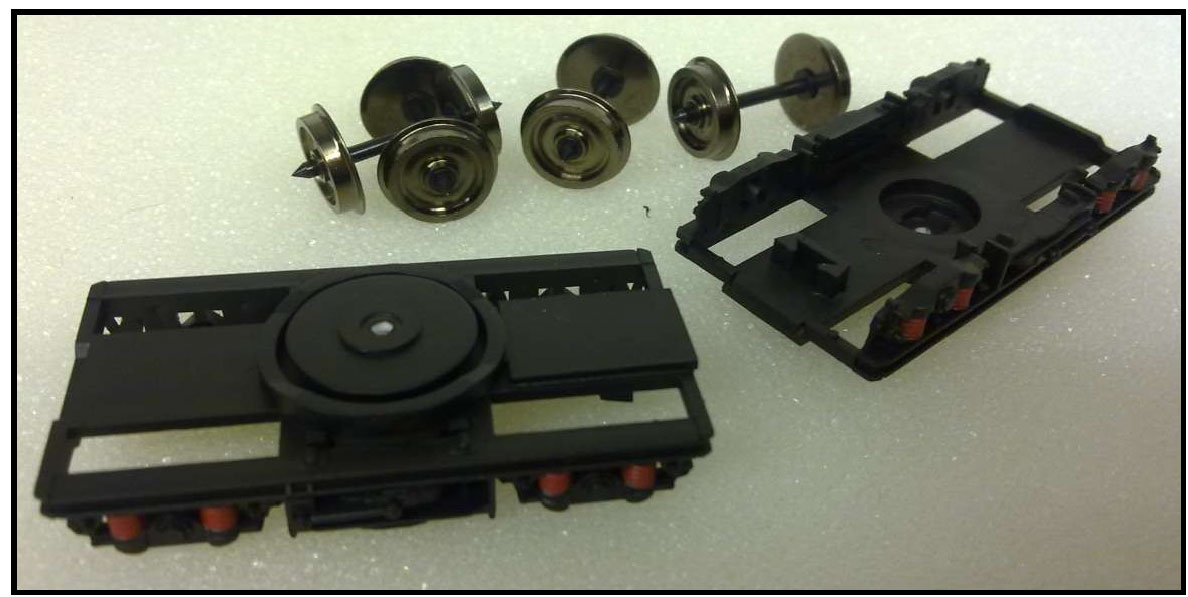
Bogies painted and ready to be fitted to chassis
I left the body, chassis and bogies to fully dry and turned my attention to the interior by painting the seats in a matt dark blue and table tops in an off white/light grey colour. This gives the coach a depth when on show and breaks up the blandness of the cream coloured moulding. Next is to gloss varnish the body ready for the application of the transfers. This is again done with an airbrush and left to dry overnight. First to go on are the red and white lining sets. I trimmed the lining to an approximate length with a sharp knife, let soak in warmish water for about 90 seconds and fed them on from one end in as straight a line as I could, making final adjustments with a fine bristled paintbrush until satisfied with its position and finally trimmed the ends and door shuts with the same sharp knife. This was left to dry overnight and upon my return I applied the coach numbers, overhead warning flashes, speed designations and coach type on the ends and the 'Intercity' branding on the coach sides. Again left to dry overnight I airbrushed in satin varnish the next day.
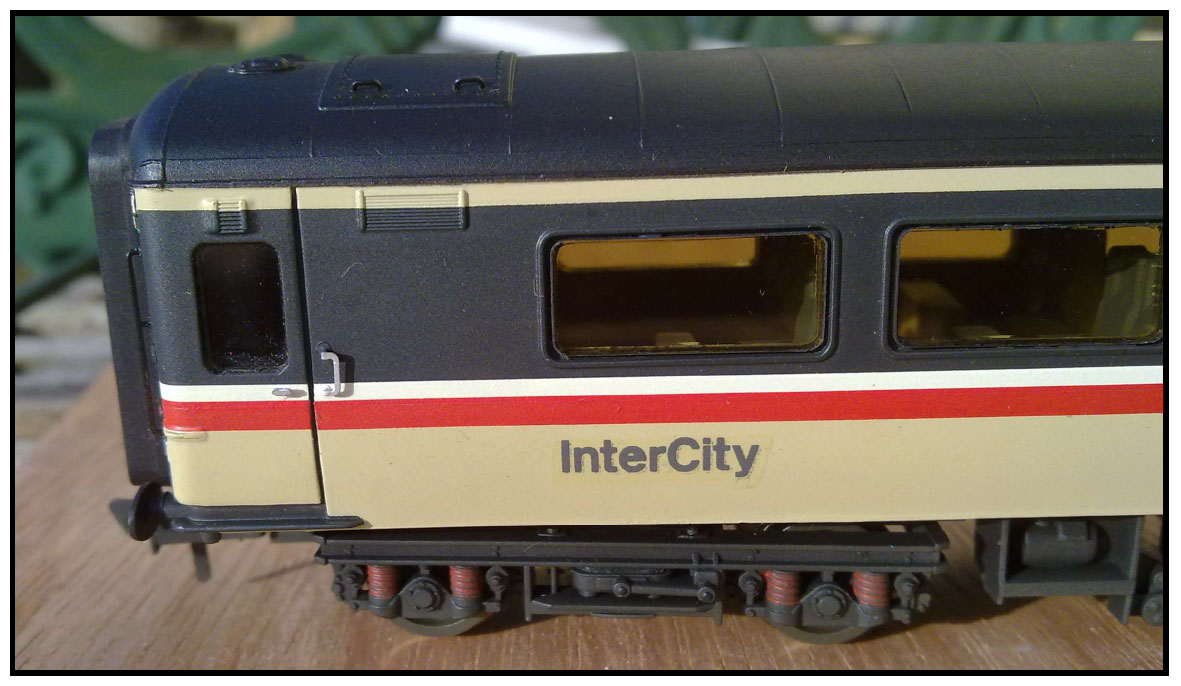
Coach lining in place showing 'Intercity' branding
Turning back to the chassis, I weathered the wheels using a sooty brown enamel wash with a brush to avoid any clean areas and followed with an air brush on the rest of the chassis but only lightly as my era of modelling dictates that these coaches are only a few months out of the paint shop.
Now we're ready to re-assemble all the components.
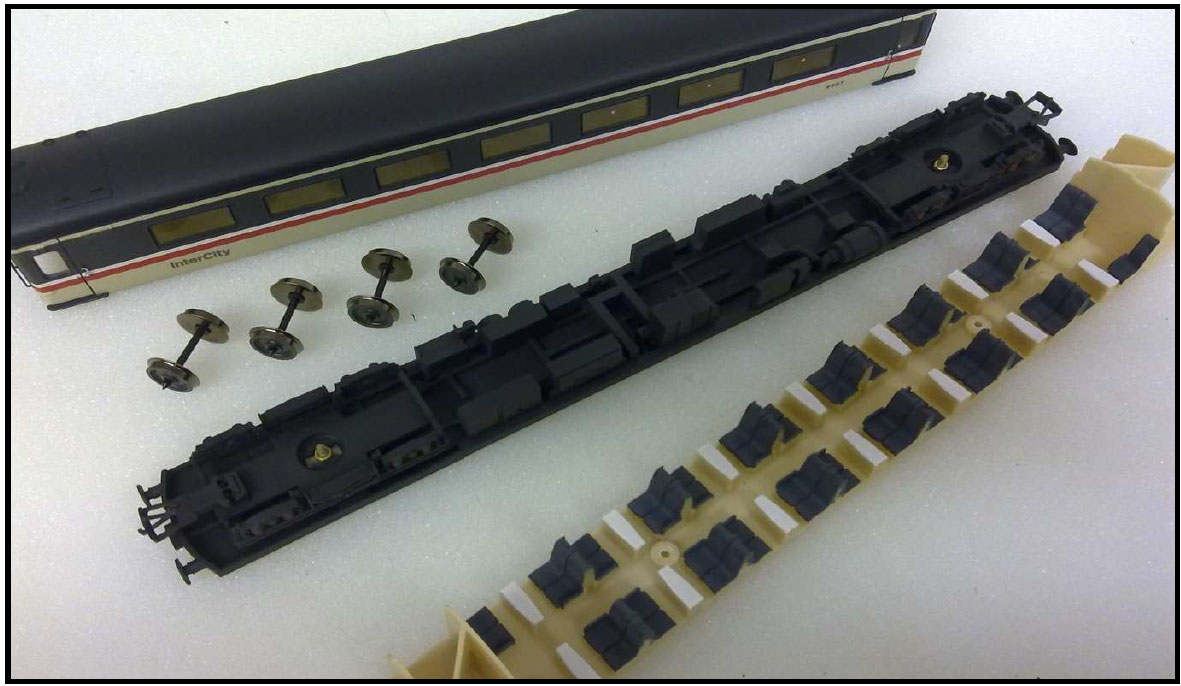
Everything ready for re-assesmbly
Putting all the parts back together is relatively straightforward, but as the old window moulding helped to hold the chassis in place, the addition of some glue in the middle of the coach stops a sagging effect taking place. I used UHU Acrilite 2 part epoxy.
The final job is to remove the masking from the windows and fix the 'no smoking' roundels to the relevant windows, leave to dry overnight and seal on using a fine paintbrush and thinned down gloss varnish. As the windows are already gloss finish there is no need to add gloss varnish prior to the decal application.
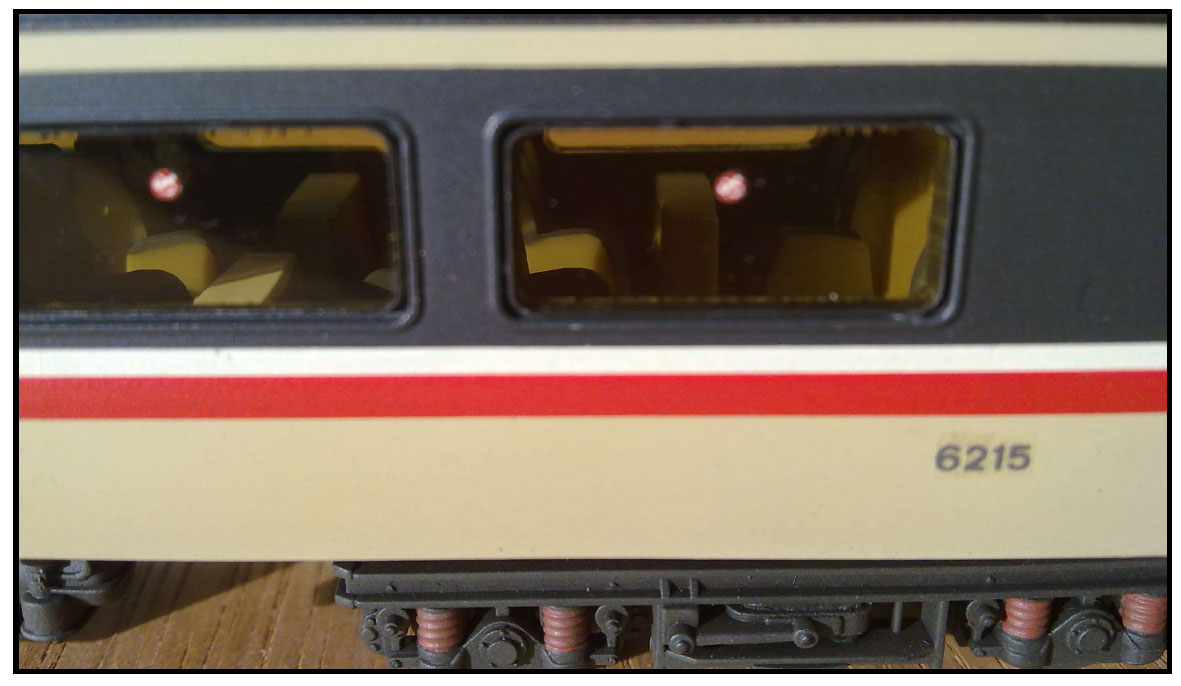
Close up showing 'no smoking' roundels, coach numbers and lining
All three coaches refurbished. They just require passengers to look complete. Although I could have fitted the Shawplan etched window frames and added lots of other detail, even cut and shut a few windows about, I think it is a matter of taste and I am pleased with the end result. With a little effort I think it shows what can be achieved in just over a week. I have a set of three coaches that will look great on my layout and I have satisfaction in knowing I made the coaches look better than before.

